Quick guide of calibration with xPDFsuite
After collecting calibration images, we can perform calibration and make program
to calculate geometry parameters to current experiment.
Here is a quick guide for how to do it with xPDFsuite
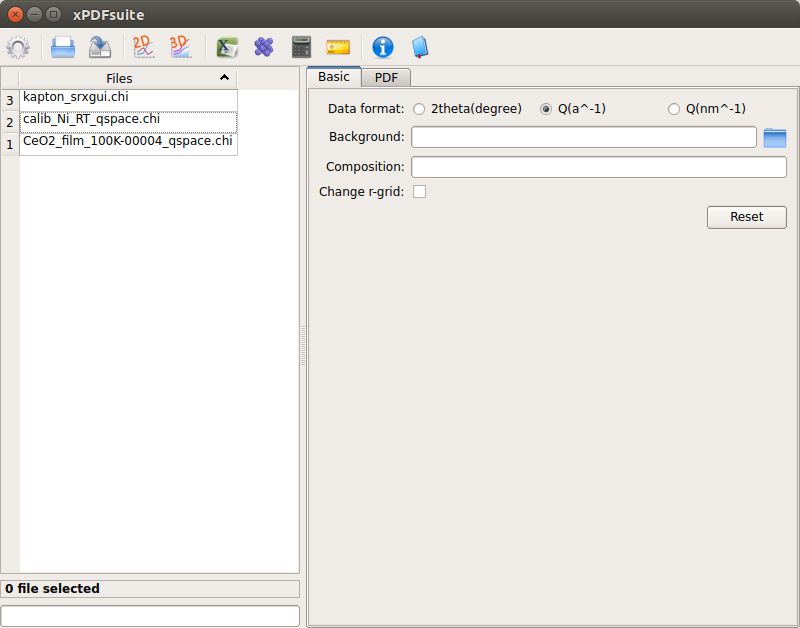
1. Type xPDFsuite or xpdfsuite in a new terminal window, to open our
data analysis tool kit xPDFsuite.
- After open it, you should see main
xPDFsuitewindow pops out:
3. Click on the green button at the top from main xPDFsuite window to open
SrXgui. Then you should have another window:
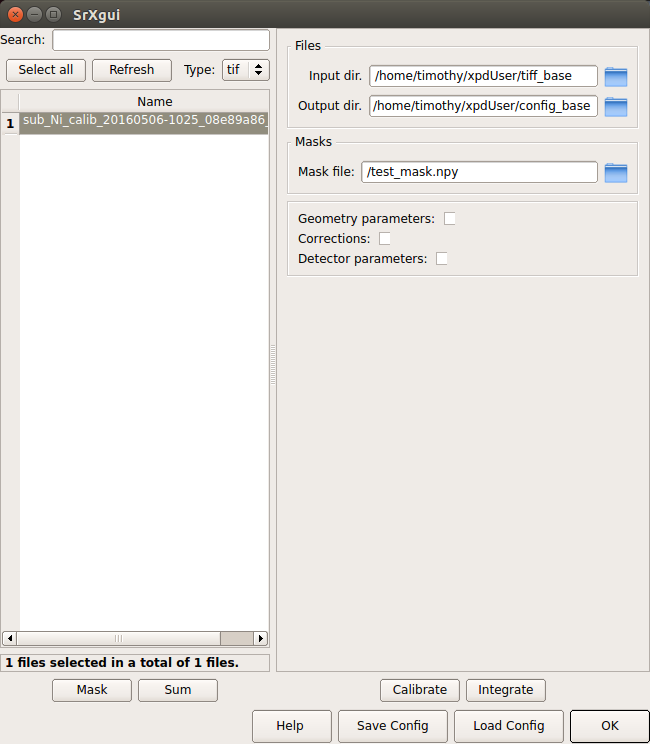
Note: This screenshot is a demonstration at local computer so
input dirandoutput dirboth point to local directory. However, at beamline, we need to properly chooseinput dirto be/home/xf28id1/xpdUser/tiff_base``and ``output dirto be/home/xf28id1/xpdUser/config_baseso that entire pipeline is completed.
4. Then clcik Calibrate button at the bottom and another window will pop out.
Choose Calibrantion mode to be Calibrant instead of self as we want
a precise calibration result.
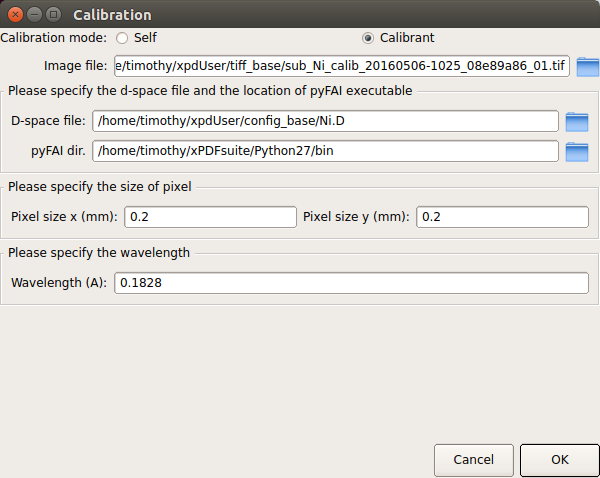
At this window, we need to specify three fields:
image file: Calibration image you wish to perform calibration onD-spacing file: A required file for known calibrants with.Dextension. Supply it based on your calibrant. For major D-space files, you can find them at hereWavelength: Wavelength for your current experiment. Please obtain from beamline scientist.When all three fields are correctly assigned, click
OKfor next step.
- First you will see an image window like this:

That is the image we want to perform azimuthal calibration with. Use magnify tool at the tool bar to zoom in and right click rings. Starting from the first, inner ring and to outer rings. Usually a few rings (~5) should be enough.

Remember to check information pop out in the terminal you used to open
xPDFsuite. It will provide you useful information.
6. After selecting rings, click on the terminal you used to
open xPDFsuite and hit <enter>. Then you will be requested to supply
indices of rings you just selected. Remember we are using python,
index starts from 0. After supplying all indices, you should have a window
like this to show your calibration:

Program will ask you if you want to modify parameters, in most of case, you don’t have to. So just hit
<enter>in the terminal and integration will be done.
- Finally 1D integration and 2D regrouping results will pop out:

You can qualitatively interrogate your calibration by looking if lines in 2D regrouping are straight or not.
8. Given all these hard works, let’s go back to SrXgui window and select the
Geometry parameters to see calibrated geometry parameters:
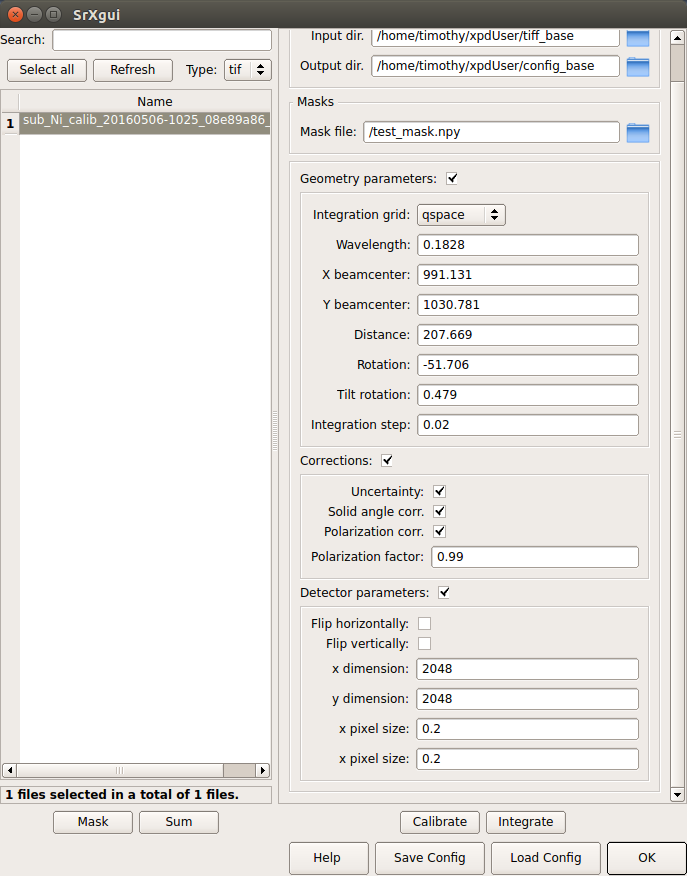
Don’t forget to save your calibration parameters! Click
Save Configat the bottom and choose directory to place this file. It should be/home/xf28id1/xpdUser/config_baseat XPD beamline.
Alright, you are done then! With automated calibration capture feature, xpdAcq
will load calibration parameters from the most recent config file in
/home/xf28id1/xpdUser/config_base
For more detailed information, please click Help in SrXgui window.